
If you plan on using scrcpy to manage your Android phone from a computer, there’s one tool you’ll need to get first: Android Debug Bridge (ADB).
ADB establishes the connection between your Android device and your computer, whereas scrcpy will establish the connection with the help of ADB to control your device.
Sounds a bit technical, but don’t worry, setting it up is far easier than it sounds. And the best part? You really only have to go through this once. After that, plugging your phone in later is basically instant.
In this guide, we’ll walk through how to install ADB for scrcpy on Windows, macOS, and Linux, enable the required Android settings, and check that everything is working correctly.
What Is ADB and Why Does scrcpy Need It?
ADB (Android Debug Bridge) is a command-line tool that allows your computer to communicate with an Android device.
scrcpy relies on ADB to establish communication with your phone. Without ADB running properly, scrcpy simply won’t see your phone; it can’t detect it, let alone control it.
ADB can also do much more than support scrcpy. With it, you can install APK files, move files around, run shell commands, fix Android problems, and handle assorted developer tasks.
For scrcpy, though, your main need for ADB is to connect your phone to your computer and grant the connection the green light.
How to Install ADB on Windows?
Windows users have a few ways to install ADB, but Google’s SDK Platform-Tools package is the simplest option for most people.
Step 1: Download Android SDK Platform-Tools
Grab the official Android SDK Platform-Tools package for Windows. That download includes ADB plus the other standard tools you need to interact with Android devices.
Extract the downloaded ZIP file somewhere easy to access, such as:
C:\platform-tools
You don’t have to install it like a traditional Windows application. ADB runs directly from the extracted folder.
Step 2: Open a Terminal in the Platform-Tools Folder
Open the folder where you extracted Platform-Tools.
Right-click an empty area inside the folder and open Terminal, PowerShell, or Command Prompt, depending on your Windows version.
Then run:
adb version
If everything is set up correctly, you’ll see the installed ADB version.
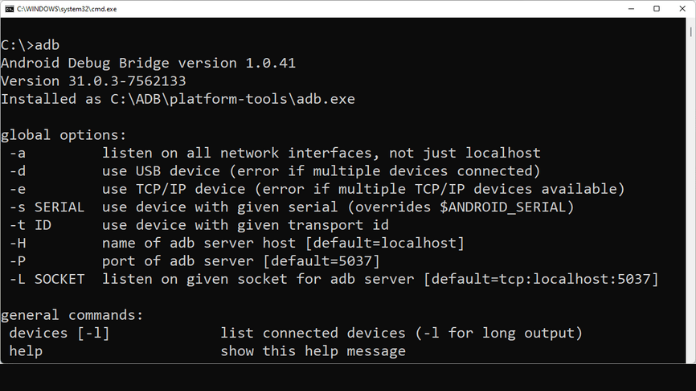
That’s your first confirmation that ADB is working.
Step 3: Enable Developer Options on Android
Now you need to prepare your phone.
Open:
Settings → About phone → Build number
Tap Build number several times until Android tells you that Developer Options have been enabled.
The location varies from manufacturer to manufacturer. For Samsung, Xiaomi, OnePlus, Google Pixel, and other smartphones, Developer Options could be located in different menus.
Step 4: Turn On USB Debugging
Go to:
Settings → Developer options → USB debugging
Turn it on.
Android may display a warning explaining what USB debugging does. Read the message and confirm if you’re comfortable enabling it.
Step 5: Connect Your Phone
Connect your Android phone to your computer using a USB data cable.
Then run:
adb devices
You should see something similar to:
List of devices attached
XXXXXXXX device
If your phone displays an “Allow USB debugging?” prompt, unlock the phone and tap Allow.
You can optionally select “Always allow from this computer” if you’re using your own trusted computer.
Once the device appears, ADB is ready for scrcpy.
How to Install ADB on macOS?
On macOS, the simplest route often involves grabbing Android Platform-Tools through a package manager like Homebrew.
If you already use Homebrew, open Terminal and run:
brew install android-platform-tools
After the installation finishes, check ADB:
adb version
Then connect your Android phone and run:
adb devices
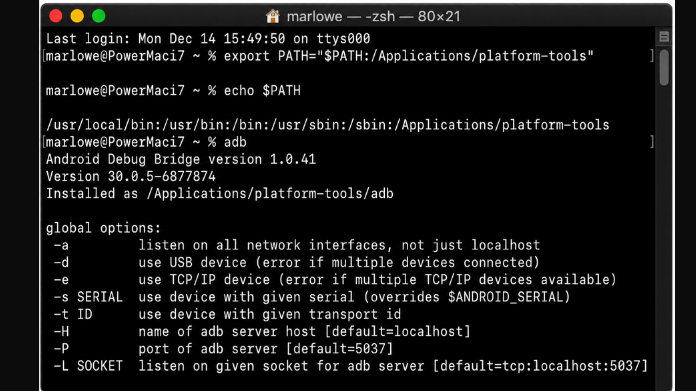
If you are asked to allow USB debugging by Android, accept the request on your phone.
Once your device pops up in the list, scrcpy is ready to go.
How to Install ADB on Linux?
The installation process depends on your Linux distribution.
On Ubuntu or other Debian-based distributions, you can generally install ADB with:
sudo apt update
sudo apt install adb
Then check the installation:
adb version
Connect your Android device and run:
adb devices
If the phone is detected and authorized, ADB is ready.
Some Linux systems might require additional udev rules or permissions to work correctly. Without those, ADB won’t be able to reach your phone. If the device isn’t detected, check your distribution’s Android-device documentation.
How to Check If ADB Is Working With scrcpy?
Once you’ve installed ADB, there’s a simple test.
Connect your phone and run:
adb devices
You should see your device listed.
For example:
List of devices attached
R58M1234567 device
Now launch scrcpy:
scrcpy
If everything is configured correctly, a window showing your Android screen should appear on your computer.
You can then use your mouse and keyboard to interact with the phone.
Final Thoughts
Actually, getting ADB to work with scrcpy is only a one-time setup process. It requires downloading the Platform-Tools package, enabling USB Debugging on your device, plugging it in, and entering adb devices in your terminal window.
And if your device shows up as “device” in this list, then you are ready; run scrcpy.
But if anything goes wrong, then it’s the simple things first: check your USB cable, verify whether your USB debugging is enabled, ensure you have allowed the connection, and update your drivers. 9/10 times, that should solve the issue.